Introduction
JIRA is a project and transaction tracking tool from Atlassian, which is widely used in defect tracking, customer service, demand collection, process approval, task tracking, project tracking and agile management. Many companies and Internet companies are using Jira as an internal process management system for team collaboration and problem ticket management.
JIRA's back-end database can choose to apply embedded database or professional database such as MySQL/PGSQL. In general, most companies choose MySQL as the underlying data store. However, with the accumulation of problem work orders, the amount of data supported by MySQL may soon reach the bottleneck for larger enterprises. Thus, users can choose to replace the MySQL default InnoDB engine with the SequoiaDB distributed database, which allows for flexible horizontal expansion while maintaining full compatibility with the Jira application.
JIRA is currently the most popular Java-based management system. Since Atlassian has been providing free defect tracking services for many open source projects, its open source is much more aware than other products, and its ease of use is also better. At the same time, open source is another feature. When users purchase their software, they also purchase the source code to facilitate secondary development. JIRA is comprehensive, user-friendly, easy to install, flexible to configure, and has excellent permissions management and scalability.

Through this article, users can learn how to seamlessly replace the standard MySQL database with the MySQL instance of SequoiaDB. SequoiaDB allows users to perform background MySQL database migrations directly to existing applications without changing a single line of code.
By applying SequoiaDB, users can get:
• Horizontal elastic expansion
• 100% fully compatible with MySQL
• Excellent transaction performance
Setup SequoiaDB
This article applies Linux Ubuntu Server 18.10 as the server, SequoiaDB’s version is 3.2.1.
This tutorial uses the sudo username password as "sequoiadb:sequoiadb" by default, and the default home path is /home/sequoiadb.
For users using other Linux distributions such as CentOS, the process described in this article may be slightly different and needs to be adjusted according to the actual situation.
Users who have already downloaded SequoiaDB’s standard virtual machine template can skip this installation deployment step directly.
1)Download and setup SequoiaDB
|
$ wget http://cdn.sequoiadb.com/images/sequoiadb/x86_64/sequoiadb-3.2.1-linux_x86_64.tar.gz $ tar -zxvf sequoiadb-3.2.1-linux_x86_64.tar.gz $ cd sequoiadb-3.2.1/ $ sudo ./setup.sh |
Press Enter to confirm each default parameter.
2) Create a default instance using the database instance user
|
$ sudo su sdbadmin $ /opt/sequoiadb/tools/deploy/quickDeploy.sh $ exit |
Setup JIRA
This tutorial applies JIRA 8.2.1.
1) Users can log in to the JIRA official website to download the installation package, or download it directly via wget.
|
$ wget https://www.atlassian.com/software/jira/downloads/binary/atlassian-jira-software-8.2.1-x64.bin |
2)Execute the package
|
$ chmod 755 atlassian-jira-software-8.2.1-x64.bin $ sudo ./atlassian-jira-software-8.2.1-x64.bin |
3) By default, the beta version of JIRA does not provide the MySQL JDBC driver, so users need to manually download the driver package. Since the current JIRA version does not support the MySQL 8 driver, users need to download the JDBC installation package for MySQL 5.1.x.

Or download directly via wget
|
$ wget https://downloads.mysql.com/archives/get/file/mysql-connector-java-5.1.46.tar.gz $ tar -zxvf mysql-connector-java-5.1.46.tar.gz |
4) Copy the JDBC driver to JIRA's lib directory and restart JIRA
|
$ sudo cp mysql-connector-java-5.1.46/mysql-connector-java-5.1.46.jar /opt/atlassian/jira/lib/ $ sudo /opt/atlassian/jira/bin/shutdown.sh $ sudo /opt/atlassian/jira/bin/startup.sh |
5) Open the SequoiaDB transaction function and set the default isolation level as RC
|
$ sudo su sdbadmin $ /opt/sequoiadb/bin/sdb > db = new Sdb() ; > db.updateConf ( { transactionon: true, transisolation: 1 } ) ; > quit ; $ /opt/sequoiadb/bin/sdbstop $ /opt/sequoiadb/bin/sdbstart |
6)Create the database
|
$ /opt/sequoiasql/mysql/bin/mysql -S /opt/sequoiasql/mysql/database/3306/mysqld.sock -u root mysql> create user 'sequoiadb'@'localhost' identified by 'sequoiadb'; mysql> create database jira; mysql> grant all on jira.* to 'sequoiadb'@'localhost'; mysql> grant all privileges on *.* to 'sequoiadb'@'%' identified by 'sequoiadb' with grant option; mysql> exit $ exit |
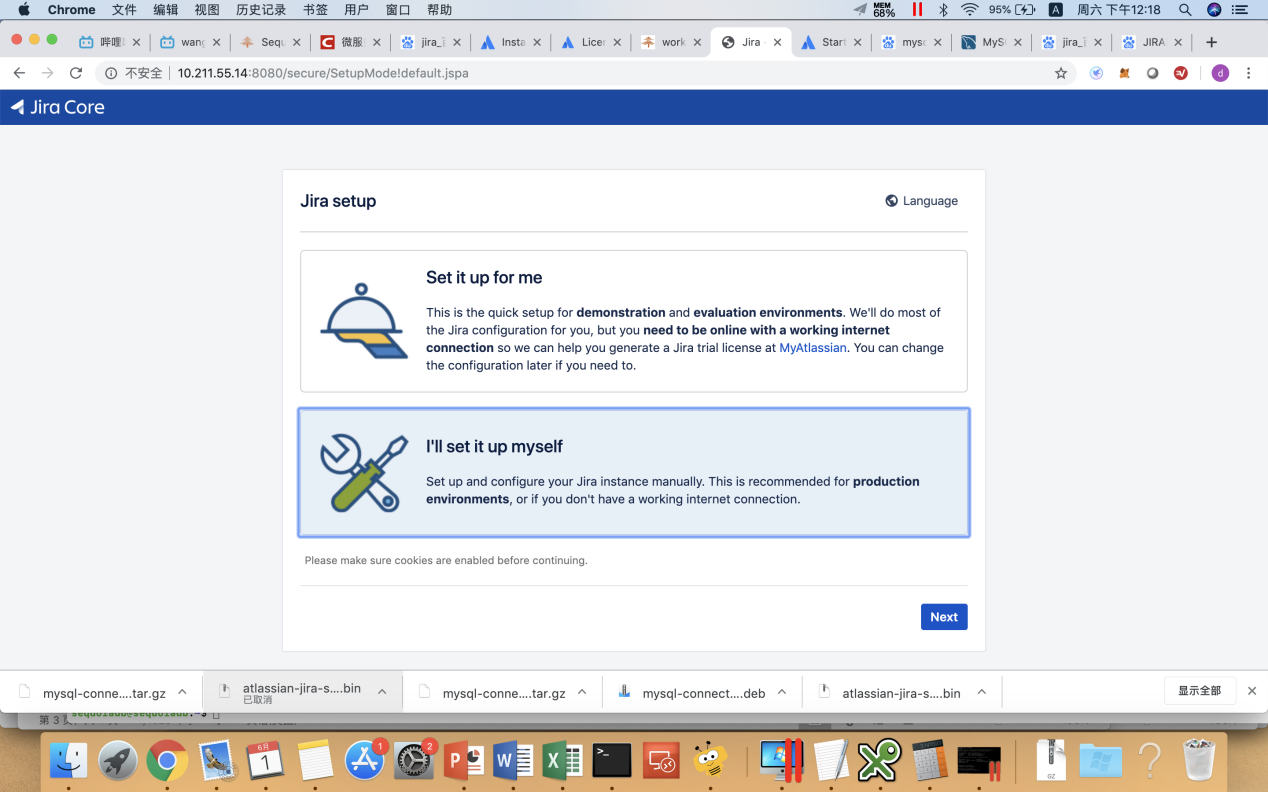
1) Use the browser to log into port 8080 of the server IP address and select "I’ll set it up myself"
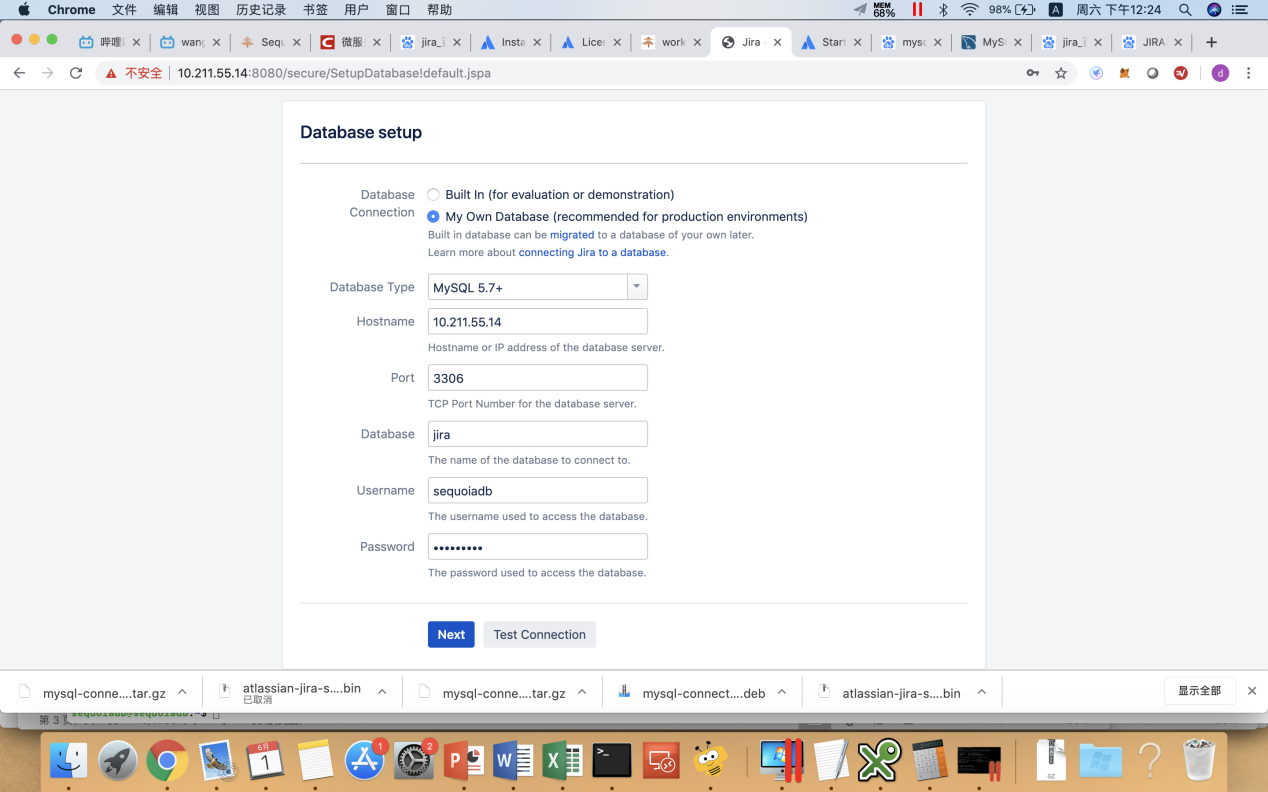
2) Select “My Own Database” on the database settings page, fill in the server IP address, JIRA database name, and sequoiadb:sequoiadb as the username and password.
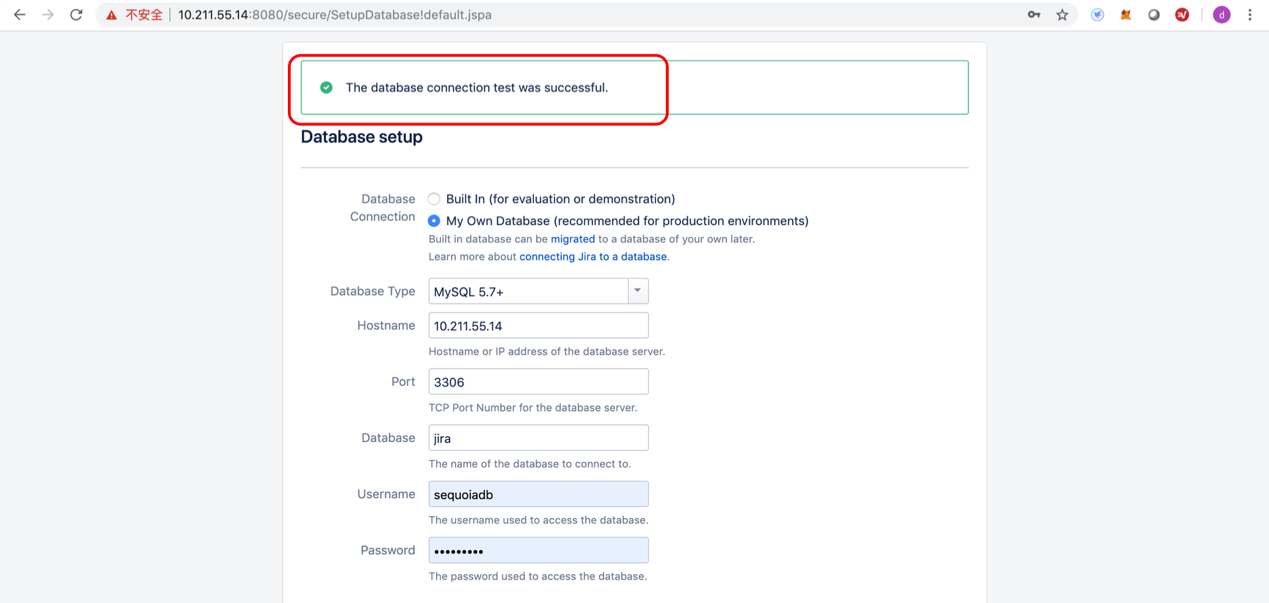
3) Click Test Connection to confirm that the database connection is correct.
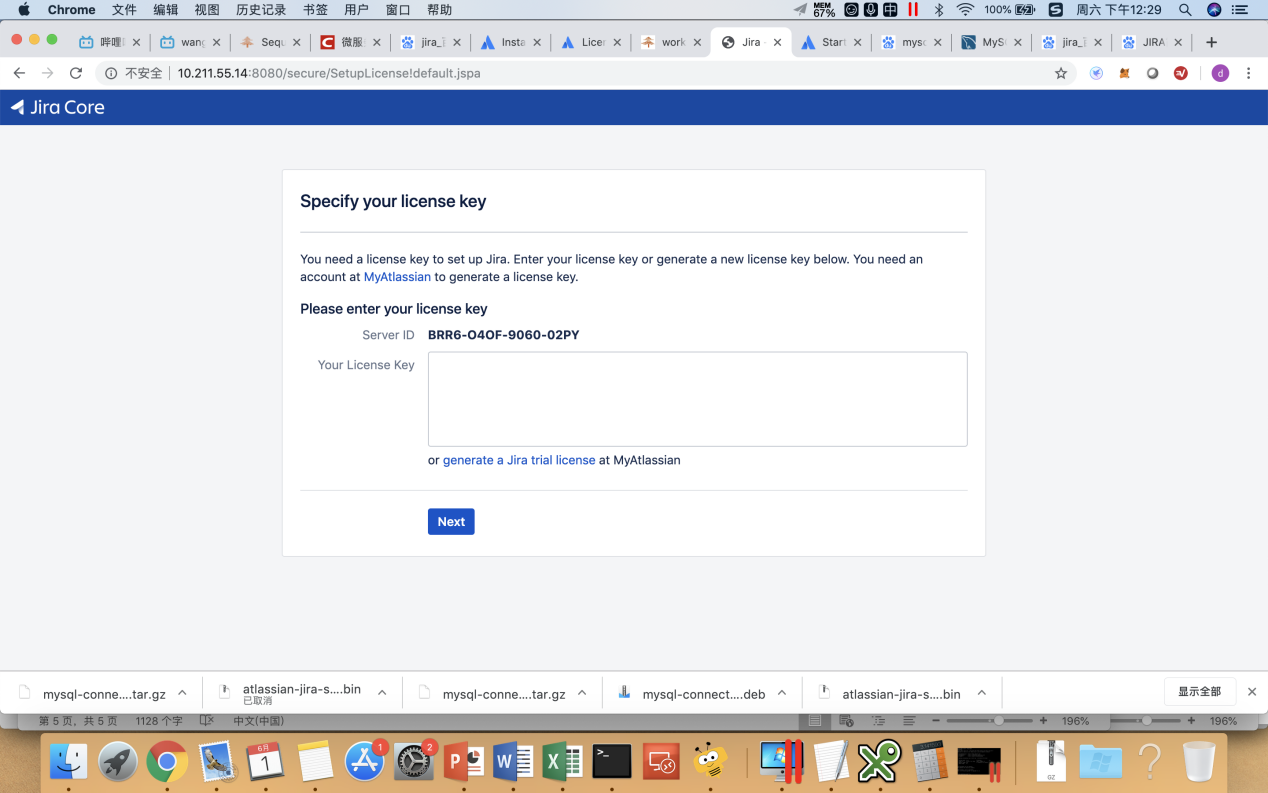
5) As a test account, users can click “generate a Jira trial license” and register on the official website to apply for a test authorization account.
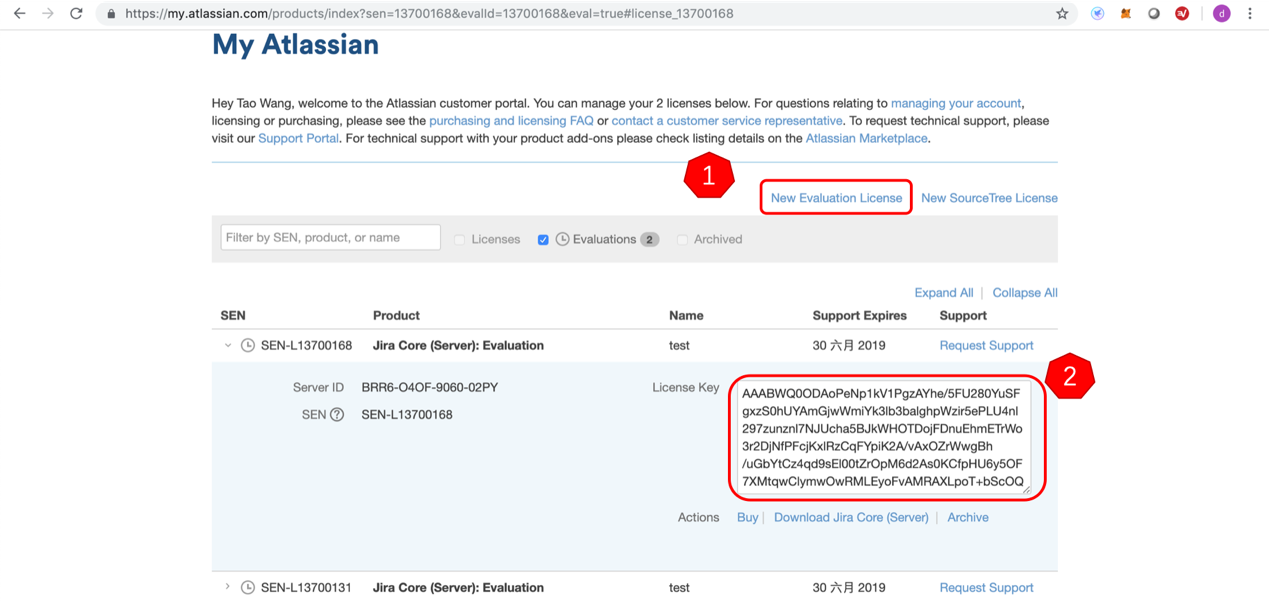
6) Paste the authorization code into the installation interface and click Next. The username and password are set to the default sequoiadb:sequoiadb
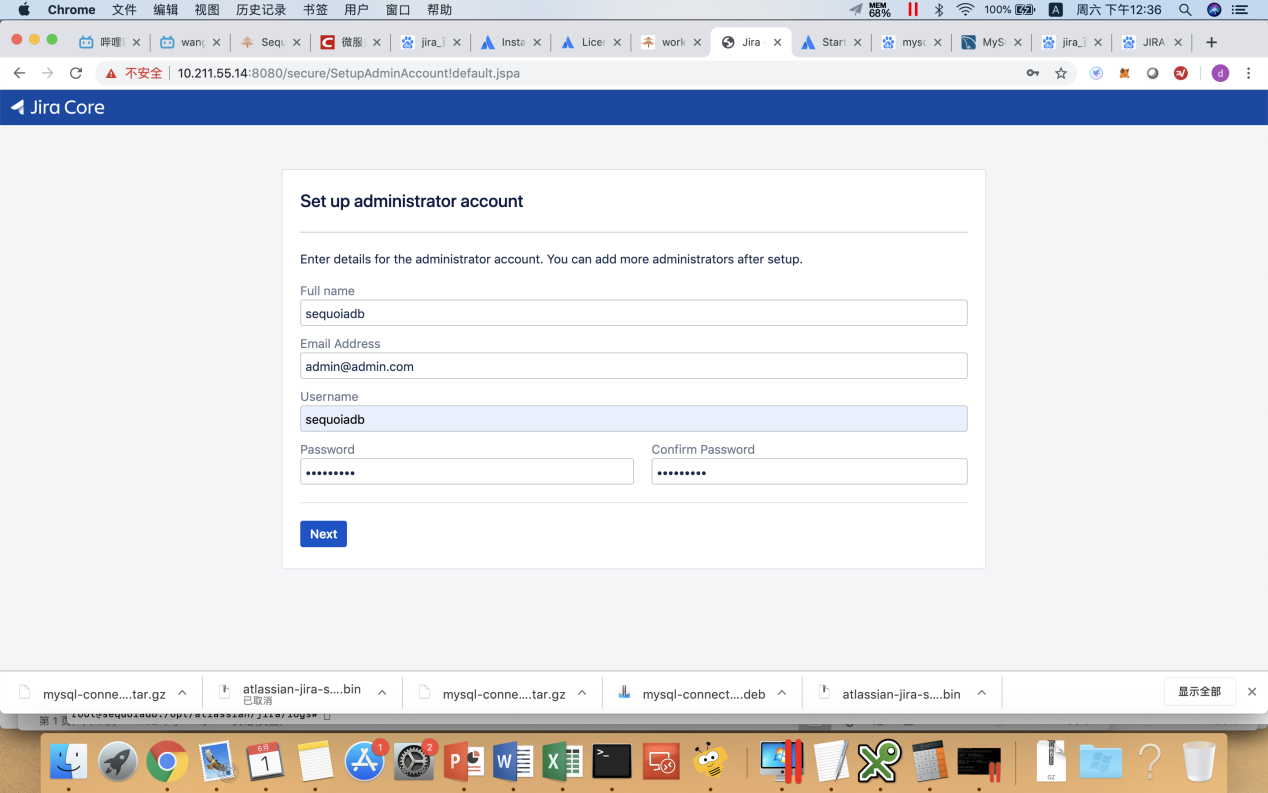
7) Complete the installation setup and create a default sequoiadb project

Switch database to SequoiaDB
In JIRA's installation and deployment program, InnoDB is specified as the storage engine for all tables by default. So users can then switch the InnoDB table to SequoiaDB via mydumper and myloader.
1)Stop JIRA
|
$ sudo /opt/atlassian/jira/bin/shutdown.sh |
2)Download mydumper
|
$ wget https://github.com/maxbube/mydumper/releases/download/v0.9.5/mydumper_0.9.5-2.xenial_amd64.deb $ sudo dpkg -i mydumper_0.9.5-2.xenial_amd64.deb |
3) Export all tables of JIRA database
|
$ sudo su – sdbadmin $ mkdir temp $ mydumper -h 10.211.55.14 -P 3306 -u sequoiadb -p sequoiadb -t 16 -F 64 -B jira -o ./temp |
4) Replace all InnoDB tables with SequoiaDB engine
|
$ sed -i "s/InnoDB/SequoiaDB/g" `grep -R "InnoDB" -rl ./temp` |
\5) Recreate the JIRA library and import the data using myloader
|
$ /opt/sequoiasql/mysql/bin/mysql -S /opt/sequoiasql/mysql/database/3306/mysqld.sock -u root mysql> drop database jira; mysql> create database jira; mysql> grant all on jira.* to 'sequoiadb'@'localhost'; mysql> exit $ myloader -h 10.211.55.14 -u sequoiadb -p sequoiadb -P 3306 -t 32 -d ./temp $ exit |
6)Restart JIRA service
|
$ sudo /opt/atlassian/jira/bin/startup.sh |
7) Re-login to the browser, now all the data in the JIRA background has been migrated from MySQL to SequoiaDB

SequoiaDB serves as a distributed database, which provides mechanisms for structured SQL, unstructured file systems, and object storage.
The MySQL instance created by SequoiaDB could provide SQL and DDL capabilities that are fully compatible with standard MySQL, allowing users to seamlessly and transparently access distributed table structures without having to adjust DDL or SQL.
This article shows to readers that how to seamlessly migrate with standard MySQL through SequoiaDB's MySQL instance. By using SequoiaDB, users can achieve near-infinite elastic scalability based on the standard ACID and MySQL protocols.